Library Panel
The library panel is where you import, organize, and view all of the photos in CyberLink PhotoDirector. It also provides access to the metadata information for each individual photo.
The library panel has two tabs: Project and Metadata. To access either tab, simply click on it to view its contents.

Project Tab
Click Project to access all of the photos in the library. When photos are imported into the library, a CyberLink PhotoDirector project database keeps track of photo location, and associated photo information, including adjustments you make to each photo. If required you can add new projects, open existing projects, or export smart collections, albums, folders, and tags as new projects.
On the Project tab you can also organize imported photos by album, folder, keyword tags, and more.
Smart Collection
CyberLink PhotoDirector automatically organizes your photos in a Smart Collection for easy browsing. Every time you import, rate, or reject photos, CyberLink PhotoDirector updates the Smart Collection.
- All Photos: select to view all the photos you have imported into the current project database.
- Latest Imports: select to view the photos that were most recently imported into the library.
- 1 Star or Better: select to view photos you have rated 1 or more stars.
- 5 Stars: select to view all the photos you have rated 5 stars.
- Rejected: select to view all the rejected photos.
Right-click on a Smart Collection folder to export the photos, or create a new project that contains just the photos in the selected collection. You can also Rename, Edit or Delete some folders out of the Smart Collection.
You can also create a custom Smart Collection based on rules you specify. To create a custom Smart Collection, do this:
- Select the Project tab, and then click
 in the Smart Collection section.
- Select Create Smart Collection.
- Enter the information in the fields as follows:
- Use the drop-down boxes to set the rules for the type of photos that you want to include in the Smart Collection.
- Click on Create to finish. CyberLink PhotoDirector creates the collection based on your selected rules.
Folders
When photos are imported into the library, CyberLink PhotoDirector organizes them into folders based on the structure of the import source location.
- Synchronize Folder: select to ensure the folder is up-to-date. Use this feature if the photos were added, deleted, or moved out of the folder. Synchronize folders as follows:
If CyberLink PhotoDirector detects any changes, the following related options become enabled.
- Import new photos: if photos were added to the folder, this option becomes enabled. Select it to import the specified number of photos into the folder.
- Show import dialog before importing: select if you want to display the Photo Import window before importing. If you do not select this option, CyberLink PhotoDirector performs a background import of the photos.
- Remove missing photos: if there are missing photos in the folder, this option becomes enabled. Select it to remove the specified number of photos from the folder. Click the Show Missing Photos button to see which photos are missing.
- Find Missing Folder: select to locate the selected folder if it was moved to a different location. Click the
 button to specify the New location of the missing folder.
- Export Photos: select to export the photos, with the any adjustments made applied, in the selected folder. See Exporting Photos for more information.
- Export Folder as New Project: select to create a new project database that only includes the photos in the selected folder.
- Remove from Library: select to remove the selected folder, and all of the photos it contains, from the library.
- Locate on Disk: select to view the selected folder, and all of its contents, in Windows Explorer.
- Rename Folder: select to give the selected folder a different name.
Albums
You can organize your photos in custom albums. To create a new album, do this:
- Select the Project tab, and then click
 in the Albums section.
- In the pop-up menu that displays:
- select Create Album with Selected Photos to create a new album that contains all the current photos you have selected.
- select Create Empty Album to create an album that does not have any photos in it.
- select Create Empty Album Set to create a new album set. Album sets are comprised of a number of albums that you can group together. You cannot add photos directly into an album set, but it can contain multiple albums comprised of a number of photos.
- Enter an Album name in the dialog that displays, and then click Create to add it to the library.
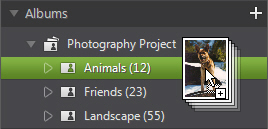
To add photos into albums in the library, just drag them from the photo browser panel to the album in the library.

- Export Album as New Project: select to create a new project database that only includes the photos in the selected album.
- Export Photos: select to export the photos, with any applied adjustments applied to them, in the selected album. See Exporting Photos for more information.
- Rename: select to give the selected album a different name.
- Delete: select to delete the selected album from the library. Any photos it contains are not removed from the project library.
Tags
You can add keyword tags to photos in the project library. Tags are useful for photo management and when sharing photos, as users search by tag keywords to find photos they are interested in.
- Select the Project tab, and then click
 in the Tags section.
- In the pop-up menu that displays:
- Enter an Tag name in the dialog that displays, and then click Create to add it to the library.
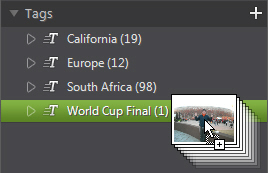
To add keyword tags to photos in the library, just drag photos from the photo browser panel to the tag in the library.

- Export Tag as New Project: select to create a new project database that only includes the photos with the selected tag.
- Export Photos: select to export the photos, with the any applied adjustments applied to them, with the selected tag. See Exporting Photos for more information.
- Rename: select to give the selected tag a different name.
- Delete: select to delete the selected tag from the library. Any photos with the tag are not removed from the project library.
Metadata Tab
Click the Metadata tab to view detailed embedded information for the current photos that are selected. Included on the Metadata tab are camera details and information about the captured photo, including date capture, shutter speed, exposure information.
|
Note: the photo metadata available on the Metadata tab is dependent on the information that was embedded in the photo when it was shot. |
On the Metadata tab you can also:
- rate each photo by selecting the desired star rating.

- click
 to flag a photo that you like and may want to use later. You can then filter flagged photos in the photo browser panel later.
- click
 to reject a photo you do not like.
- add copyright information to your photos. To do this, select all the photos you want to add copyright information to, click in the space next to the Copyright item in metadata, and then enter the copyright info in the field provided.

- select Tags to view all the tags for the selected photos. If required, you can create a new tag for all the selected photos by entering it in the field provided and then clicking
 .
.

- hover your mouse over a tag and then click
 to remove it from a photo.